Biscoff Cookie Butter Truffles Recipe
Introduction
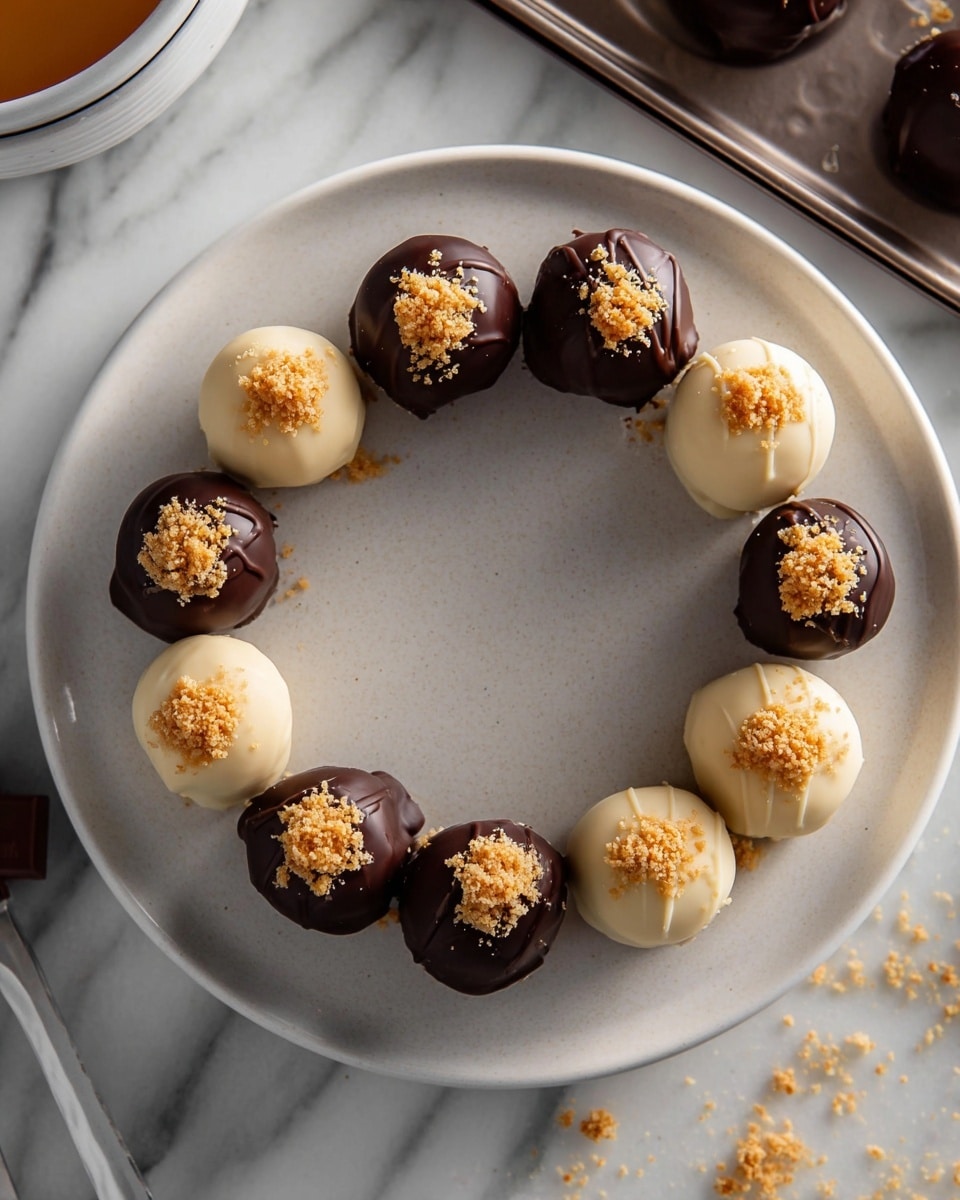
Biscoff Cookie Butter Truffles are a decadent treat that combines creamy cookie butter with crushed Biscoff cookies, all wrapped in a smooth chocolate coating. These bite-sized delights are perfect for impressing guests or satisfying your sweet tooth with minimal effort.
Ingredients
- 1 cup Biscoff cookie butter (aka the holy grail)
- 1 (8 oz) block of cream cheese, softened
- 1 ½ cups crushed Biscoff cookies (about 20–25 cookies)
- 12 oz chocolate chips (milk, dark, or white—you do you)
- 1 tbsp coconut oil (optional, but helps with smooth chocolate)
Instructions
- Step 1: Crush the Biscoff cookies into fine crumbs using a food processor or place them in a zip-top bag and smash with a rolling pin.
- Step 2: In a bowl, combine the softened cream cheese and cookie butter. Stir until smooth and creamy, then add the crushed cookies and mix until you get a thick dough-like texture.
- Step 3: Scoop out about 1 tablespoon portions of the mixture and roll into balls. Place them on a parchment-lined baking sheet and freeze for 20–30 minutes to firm up.
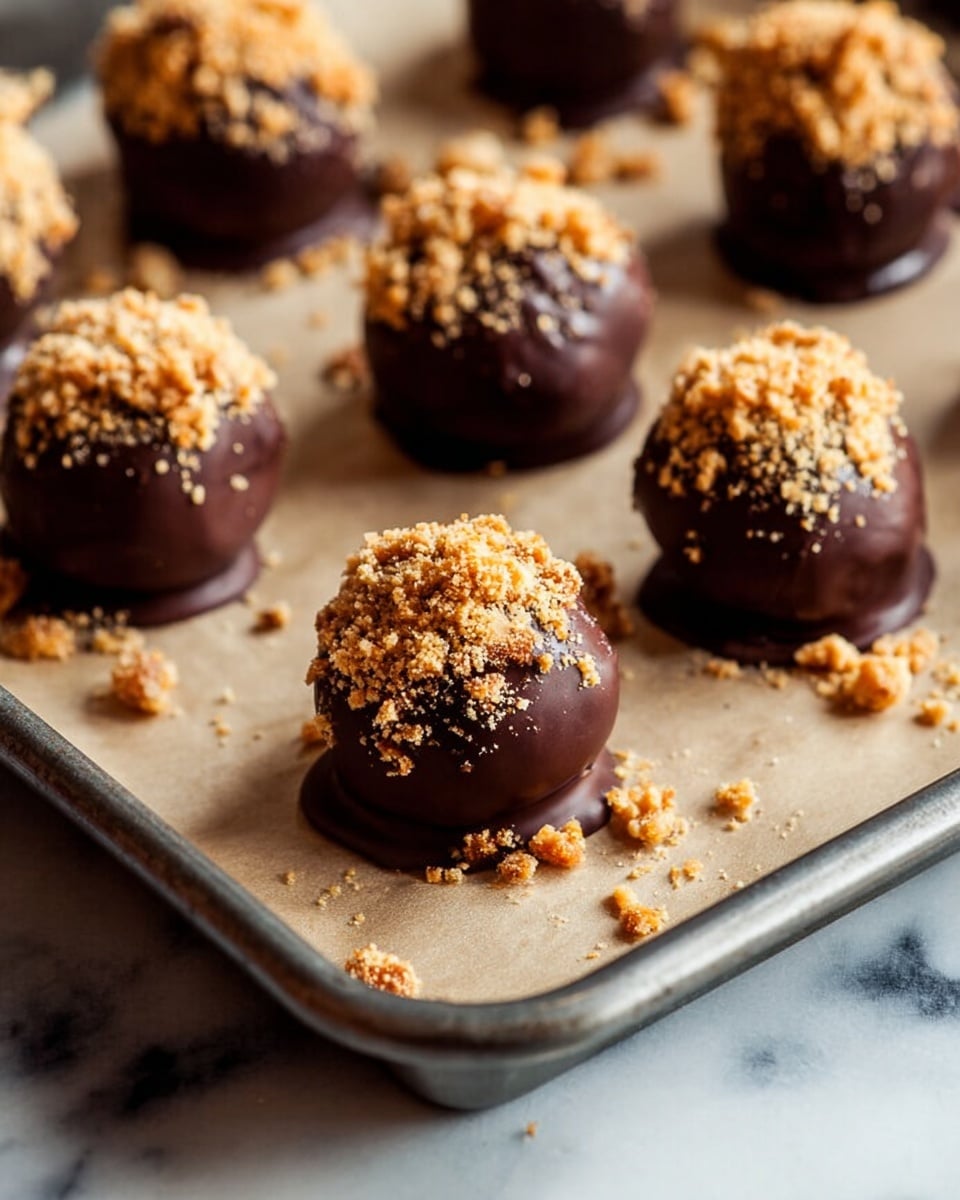
- Step 4: Melt the chocolate chips with coconut oil (if using) in 30-second intervals in the microwave, stirring until smooth. Dip each chilled truffle into the chocolate, tap off excess, and place back on the parchment. Optionally, sprinkle crushed Biscoff cookies or sea salt on top before the chocolate sets.
- Step 5: Chill the coated truffles in the fridge for 15–20 minutes until the chocolate hardens, then enjoy!
Tips & Variations
- Swap cream cheese for mascarpone for a richer flavor.
- Use white chocolate for a sweeter, creamier coating.
- Add a pinch of sea salt on top to balance the sweetness perfectly.
- Store leftover truffles in an airtight container in the fridge for best freshness.
Storage
Store the truffles in an airtight container in the refrigerator for up to one week. To enjoy, let them sit at room temperature for a few minutes before serving. Reheating isn’t recommended as it may affect the texture.
How to Serve
Serve this delicious recipe with your favorite sides.
FAQs
Can I use regular peanut butter instead of Biscoff cookie butter?
While you can substitute peanut butter, the flavor will change significantly. Biscoff cookie butter has a unique spiced caramel taste that is key to the truffles’ signature flavor.
Can I make these truffles ahead of time?
Yes, you can prepare the truffles and keep them refrigerated or frozen. Just thaw them in the fridge before serving to maintain the best texture and flavor.
PrintBiscoff Cookie Butter Truffles Recipe

Delicious and indulgent Biscoff Cookie Butter Truffles featuring a creamy blend of Biscoff cookie butter, cream cheese, and crushed Biscoff cookies, all coated in smooth melted chocolate. These no-bake, easy-to-make truffles are perfect for a quick treat or a special dessert that will satisfy any sweet tooth.
- Prep Time: 15 minutes
- Cook Time: 0 minutes
- Total Time: 50 minutes
- Yield: 20–24 truffles 1x
- Category: Dessert
- Method: No-Cook
- Cuisine: American
Ingredients
Truffle Base
- 1 cup Biscoff cookie butter
- 1 (8 oz) block cream cheese, softened
- 1 ½ cups crushed Biscoff cookies (about 20–25 cookies)
Chocolate Coating
- 12 oz chocolate chips (milk, dark, or white)
- 1 tbsp coconut oil (optional, for smoother chocolate)
Instructions
- Crush It (Literally): Crush Biscoff cookies into fine crumbs using a food processor or by placing them in a zip-top bag and smashing with a rolling pin.
- Mix Like a Boss: Combine softened cream cheese and Biscoff cookie butter in a bowl and stir until smooth and creamy. Add the crushed cookies and mix until it forms a thick dough-like texture.
- Roll ‘Em Up: Scoop about 1 tablespoon portions of the mixture and roll into balls. Place them on a parchment-lined baking sheet. Freeze for 20–30 minutes to firm up.
- Chocolate Time: Melt chocolate chips with coconut oil (if using) in 30-second bursts in the microwave, stirring between each until smooth. Dip each chilled truffle into the melted chocolate and tap off excess. Optionally, sprinkle crushed cookies or sea salt on top before chocolate sets.
- Chill and Devour: Place coated truffles in the fridge for 15–20 minutes until the chocolate hardens. Enjoy!
Notes
- Freezing the truffles before dipping ensures they hold their shape and makes dipping easier.
- Use any type of chocolate chips depending on your preference: milk, dark, or white chocolate all work well.
- The optional coconut oil helps to smooth out the melted chocolate for a glossy finish.
- Store truffles in the refrigerator in an airtight container for up to one week.
- For added texture and flavor, sprinkle crushed Biscoff cookies or a pinch of sea salt on top of the dipped truffles.
Keywords: Biscoff truffles, cookie butter truffles, no-bake desserts, easy chocolate truffles, Biscoff cookie butter recipe, cream cheese truffles